- Category: Hygiene
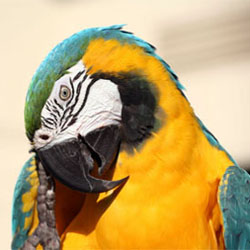 In the wild, a parrot's beak and nails are maintained naturally in the course of chewing, nut cracking, nest building, climbing, tearing apart fruits and vegetables, landing and walking on rough branches, and swiping beaks frequently on hard, rough surfaces. All this “parrot work” assists in manicuring their beaks and nails. Domestic parrots don't have as varied an environment or activity level. Therefore, some level of human intervention is required to achieve what is accomplished naturally by their wild counterparts.
Besides lack of activity, improper nutrition and health problems can also result in beak and nail problems as exhibited by overgrowth, brittleness or softness. It is suggested that you routinely monitor the status of your bird's beaks for signs of overgrowth, cracking, flaking, lesions or color changes. A healthy beak is well aligned as well as uniform in shape, color and texture.
The best way to assist your parrot in grooming its own nails and beak is to have a variety of destructible chewing toys and accessories such as grooming perches available and appropriately placed within their cage at all times. Multiple perches and climbing toys stationed throughout the cage will stimulate your bird to be more active and move within his environment which will assist in maintaining his nails and beak, as well as improve his overall mental and physical fitness.
Proper placement of grooming perches is essential to ensure they are effectively used and not overused. Due to their abrasive nature, grooming perches can irritate a bird's foot if they spend excessive time on it. Therefore, it is recommended that they not be placed in the area of the cage where your bird commonly sleeps, typically the highest perching spot. Rather, place the grooming perch near the food dishes where he is assured to spend some time and where he is also likely to use it to scrape his beak.
Although the use of the above mentioned accessories will not completely eliminate the need for manicuring your bird's beak and nails, it will greatly reduce the frequency of having to subject your bird to grooming. Further guidelines and specific recommendations pertaining to the health, maintenance and care your bird's beak and nails are contained in our related articles:
Write comment (0 Comments)- Category: Hygiene
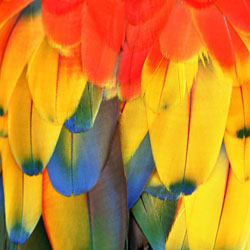 Feathers are unique to birds and they are an elegant masterpiece of design. The three most prevalent categories of feathers, each of which serves a distinct purpose, are the:
- Flight feathers which are located on the wing and tail are long, strong and flexible to provide power for flight.
- The wing feathers overlap to provide a surface to push against the air on the downstroke and create lift.
- The tail feathers are used for lift, balance, steering and braking.
- Contour or body feathers which provide for a bird's smooth shape and color. The contour feathers overlap each other like roof shingles to provide for protection to the skin from injury, the weather (wind & rain) and sunlight.
- Down feathers which are soft and fluffy and help to insulate birds by trapping air and preventing their skin form getting wet.
Feathers also serve to:
- assist some species to blend into the environment (camouflage)
- show off secondary sex characteristics
- allow for courtship display (tail-fanning)
Feathers are a key indicator of a bird's health status. A healthy bird will have shiny, brightly colored and smooth plumage. Conversely, an ill, stressed or malnourished bird's feathers often exhibit stress bars or are dull, discolored and rough in appearance. Poor feather condition, in many cases, is simply the result of poor hygiene and the lack of bathing opportunities.
Preening
Due to their importance, birds instinctually take each day to make sure their feathers are "all in order." Feathers must be kept clean, fluffed, oiled and neatened up daily through the process of preening.
Birds preen by methodically running their beaks through their feathers or by scratching their heads with their toes. Birds also rub their heads against objects in their cage to assist in reaching the hard to get spots. In the process, they are busily grooming and removing the feather shaft "wrappers" as new feathers come in, returning their feathers to their correct position and form, removing parasites and waterproofing and conditioning their feathers.
Most parrots, with the notable exceptions of amazons and some macaw species, have a preen gland at the base of their tail. This gland produces an oil that helps to keep the feathers and beak conditioned. During the preening process, parrots are observed "pinching" this area and then rubbing the area with their beak to "collect" the oil. The oil is then transferred to the other feathers as they are individually preened. The oil also contains vitamin D3 precursors that, upon exposure to sunlight (UV-B rays), are converted to the essential vitamin D3 which is then ingested during the preening process.
Moulting
A bird's feathers are replaced with new ones 1-2 times per year through the natural process of moulting. The frequency of moulting varies from species to species and the moulting process is staged so that a bird doesn't lose all of it's feathers at once, which would impair their ability to fly and regulate their body temperature.
You can tell a bird is moulting by the abundance of feathers floating around the floor and the appearance of pinfeathers. Pinfeathers on a bird's head or neck can be annoying to a bird. New feathers grow inside a sheath that needs to be broken open to allow the feather to expand. A singly caged bird may appreciate your help in preening the new feathers that he can't reach. You can open up the feather by carefully and gently squeezing the shaft with a finger nail or by rolling them between your fingers to break the sheath. Be careful to avoid blood feathers as squeezing them may cause your bird some discomfort. Blood feathers are new, developing feathers that still have a supply of blood running through the quill. Blood feathers can be identified by their thick dark shaft.
Moulting can be a stressful time for a bird and it is important to make sure they are provided a nutritious diet and plenty of rest. During a molt, your bird's body demands a higher level of energy and nutrients. Therefore, dietary supplements may be beneficial.
Making sure your bird has adequate opportunities for bathing will also help alleviate some of the itchiness factor for your bird.
Feather Picking
Feather picking is a destructive, often obsessive behavior in which a bird destroys its feathers by over-preening, biting them in half or pulling them out. This is one of the most frustrating and complex problems a bird owner may have to face. There are many possible causes of feather picking behavior and halting it is very difficult as there are no easy solutions to the problem.
There are medical and non-medical causes for feather picking. The first step to take if your bird starts feather picking is to have him examined as soon as possible by your avian vet to ensure the picking is not medically related (i.e., due to malnutrition, injury or illness). Common causes of picking are:
- Bacterial, viral or fungal infection
- Malnutrition
- Disease (metabolic, PBFD, PDD)
- Behavioral Origin (boredom, stress, anxiety)
- Allergies (mold, pollen, dust, food, mites)
- Environmental (low humidity, inadequate cage, lack of bathing opportunities)
- Exposure to toxins (zinc, indoor pollutants)
- Parasites (lice, Guardia)
- Physical pain (broken bone, internal organ)
If the picking is determined to be behaviorally or environmentally related you may want to consult with an avian behavioral consultant.
You can greatly reduce the chance of your bird starting this destructive behavior by consistently:
- Providing daily opportunities for bathing to encourage normal preening behavior.
- Providing a variety of stimulating toys to alleviate boredom including preening toys.
- Providing a nourishing and interesting diet
- Placing food and treats inside foraging devices
- Exposing your bird to natural sunlight or full spectrum light daily
- Allowing your bird to get adequate sleep
- Removing toxins from your bird's environment
- Interacting with your bird on a daily basis
- Reducing stressors in the environment.
- Category: Hygiene
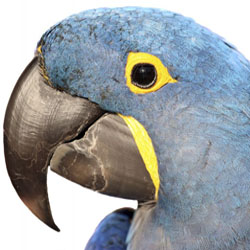 Parrots are termed hookbills due to the curved, hook-like shape of their beak. Finches and canaries with their short, straight beaks are considered softbills. The shape of a bird's beak determines the type of diet it can consume.
A parrot's beak is very strong as demonstrated by their ability to crack open nut shells and devour fruits with thick skins. Parrot beaks are also extremely agile in that they required to be used to delicately groom feathers. All in all, they are amazing tools. Just consider all the functions upon which a bird must rely on his beak to accomplish and you will understand how vital a tool it is to their survival:
- Eating
- Gripping
- Climbing
- Preening
- Defense
- Courtship play
- Feeding young
- Burrowing a nest
No wonder a bird's beak is often referred to as it's "third hand!" A bird's beak, just like human fingernails, is continually growing. Growth can be up to 3 inches per year depending on the bird species. If provided with adequate chewing opportunities, a healthy bird's beak will rarely require grooming.
You can help your bird maintain his beak health by providing items to encourage chewing and exercise of the beak:
- destructible chew toys
- foraging toys
- hard shell nuts
- natural perches
- lava rock
- calcium blocks or cuttlebone
- climbing toys
Additionally, items such as grooming perches with a rough abrasive surface are great for birds to be able to rub their beaks on.
Seriously overgrown beaks can inhibit a bird's ability to eat and groom themselves properly and will necessitate professional grooming. Be aware that an overgrown beak or an abnormal growth on the beak may also be a sign of disease or infection. Liver disease, vitamin D3 deficiency and trauma can all lead to abnormal growth. The underlying cause of the beak deformity will need to be investigated by your vet.
A parrot’s beak consists of many layers of keratin and there are multiple nerve endings at the tip of a parrot’s beak. Mistakes can result in very serious and painful injury and deformity. It is highly recommended that only your veterinarian trim your bird's beak, a process which involves grinding and reshaping the sides of the beak and dulling the tip.
Write comment (0 Comments)- Written by: Deb White
- Category: Hygiene
 (Cue the horror music please!)
Remember those classic B-movies about bugs? The Fly, Eight-Legged Freaks, Slither, Them.... Well, they certainly come to my mind when bug season is in full swing with clouds of fruit flies, trails of ants, blood thirsty mosquitoes and the dreaded food moths. Since our dear birds can't be exposed to many of the very toxic commercially available bug killers its good to know that there are many alternative bird-safe, natural and inexpensive pest control methods we can use.
The best defense is a good offense when it comes to the war on bugs. Once they take hold it is generally a much more involved process to get rid of them especially since, as responsible stewards of our bird's health, we can't rely on the many commercially available and highly toxic solutions for pest control. By taking some precautionary measures you can eliminate or at least minimize pest problems. There are some general prevention principles that apply to the control of many insects:
- Determine how and where they are entering your home and seal cracks, repair torn screens, etc.
- Eliminate access to the food, water and breeding grounds that they need to survive.
- Refrigerate all perishable food, especially in the summer, when fruits and vegetables may spoil quickly.
- Make sure all the food in your house is sealed. Tightly wrap food set out on kitchen counters.
- Promptly clean up after meals and regularly take all trash out of your home.
- Move outdoor trash and recycling bins as far from your home as possible.
- There are also specific things you can do according to the type of insect you are trying to eliminate based on their behavior and life cycles as described in the following sections:
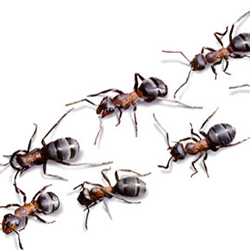 ANTS
ANTS
It is estimated that ants have been living on Earth for greater than 100 million years and that there are over 20,000 species of ants existing. Ants are hardy creatures and sometimes very difficult to eliminate. Ants live in social colonies and send out scouts from the colony to locate food and water. As the scouts travel they lay down a scent trail that enables the other members of the colony to travel to the found food source.
The key steps in preventing an ant infestation are to:
- Eliminate scent trails
- Remove food sources (keep counters and floors free of crumbs and other food bits)
- Block access into the house
Natural Remedies:
- Eliminate scent trails by wiping the countertops and hard floor surfaces where you have noticed ants with a 50% solution of vinegar.
- Ants will not cross various substances such as talcum powder or chalk therefore you can lay down a line of these materials across the point where ants are entering your house.
- Sprinkle cinnamon, black pepper, cayenne pepper, chili pepper, cloves or garlic or lemon juice wherever you've seen ants entering the house. The strong smells reportedly repel ants.
- Sprinkle used coffee grounds around the outside of your house. Again, the strong smell acts as a repellant.
- You can also use corn meal. The ants will carry it home and try to eat it, but they can't digest it properly and will die. Be sure to put corn meal wherever you see that the ants like to frequent. This method is especially great around pets or children, as corn meal by itself is not poisonous.
- Place bitter cucumber or citrus peels near the site of ant activity. Cucumber and citrus peels are toxic to the types of fungi that ants feed on, and therefore avoided by the ants.
- Pour boiling water over their mounds and into the cracks where they dwell.
- Ants won't cross soapy water so therefore you can set the legs of your bird's cage (or your dog's food bowl) in small pans of soapy water to keep ants from climbing up and eating their food.
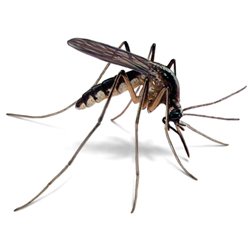 MOSQUITOES
Swarming, blood sucking insects that carry disease have never ranked high on my list especially since the arrival of the West Nile Virus which kills birds and humans alike. West Nile is a virus transmitted by mosquitoes that can cause encephalitis, a condition that may lead to permanent disability or even death.
The key steps in preventing mosquitoes are to:
- Eliminate standing water around your property. Mosquitoes use standing water as breeding grounds. Change the water in outdoor bird baths, wading pools and pet water bowls every few days and put away yard items that collect water.
- Eliminate points of entry into your house by sealing window cracks and repairing town screens.
If you have an outdoor aviary you especially need to be concerned with mosquitoes:
- Avoid putting your birds outside in the early morning and early evening when mosquitoes are most active.
- Mosquitoes prefer still air so they are much less of a concern on breezy days. Consider placing a fan near your birds outside cage.
- Use mosquito netting over outdoor aviaries and cages.
- Burn citronella candles or torches while outside with your birds.
More Natural Remedies:
- Hang some bat houses in your yard. Mosquitoes are the primary source of food for many bat species. Some can eat up to 1,000 of the nasty little blood suckers an hour!
- Bird safe, non-toxic pheromone-based mosquito traps are commercially available.
- Several garden plants are known to repel mosquitoes. Why not plant some and beatify your yard at the same time?
- Citronella grass (source of citronella oil)
- Catnip - the oil from this plant has actually been found to be more than ten times better at repelling mosquitoes than DEET.
- Rosemary
- Marigolds have a particular smell that many insects find objectionable.
- Plant tansy or basil around patios, porches, windows, doors, or other areas that you want to keep mosquitoes away from.
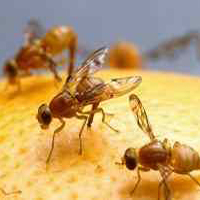 FRUIT FLIES
Fruit flies love little bits of rotting food. They choose to lay their eggs on just about anything they can find - especially on fruits and vegetables left on counters, in our bird's dishes or on their cage bottoms. Once these invaders find their way into our homes they are very difficult to overcome. The principal reason is that fruit flies are VERY prolific breeders and can lay up to 500 eggs at a time. Ugh! They also have the potential to contaminate food with dangerous bacteria.
Prevention:
- To eliminate fruit flies you have to cut off their food supply.....not so easy when we are all feeding our birds a daily regimen of fresh fruits and veggies. During fruit fly season feed fruit in smaller quantities and remove the uneaten portions within an hour.
- Wipe up spills and messes. Fruit flies are attracted by sugars. Use a water and bleach solution to wipe down counters.
- Sweep up tossed food bits and change cage bottoms frequently.
- Take out all garbage regularly so that any eggs don't hatch and develop into fruit flies. The life cycle from an egg into a adult flying fruit fly is under a week and then they only live 24 hours.
- Refrigerate all fruit and vegetables.
- Eliminate points of entry into your house by sealing window cracks, repairing torn window and door screens.
Removal:
- Fruit flies are attracted to vinegar. A jar with vinegar water left out overnight
- will lure them and they will then drown.
- Make a homemade fruit fly trap by placing a banana chunk in a clean odorless glass jar and tightly covering the jar with plastic wrap that has 5-6 fruit fly sized holes poked in the surface. Once a fruit fly crawls in, it can't get out.
- Use a commercially available pheromone based trap for mosquitoes.
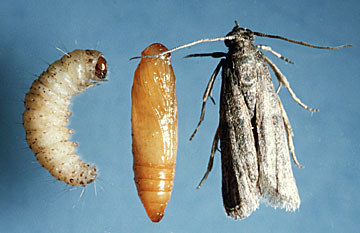 MOTHS
MOTHS
The Indian Meal Moth (aka Bird Seed Moth) does not feed on but rather lays eggs in grain and grain-based products. There are four stages in the life cycle of an Indian meal moth, starting with the egg phase. The larval stage causes the injury. Larvae are generally surface feeders but can feed within the grain. As they feed, larvae spin silken thread webbing throughout the infested food source. Small particles are often seen adhered loosely to the threads.
When full-grown, the larva migrate out of the food source and travel across walls and ceilings, making cocoons in cracks and crevices, emerging a few days later as adult moths. They are frequently found making cocoons in cracks and crevices on cupboard tops, shelves, ceiling corners, and walls. The complete life cycle from egg to adult moth takes one to two months.
Prevention & Remediation:
As with most insects, moths are easier to prevent than remediate.
- Prevent moths from getting inside your bird food by using air-tight storage containers. Don't use plastic bags as the adult moths are able to chew into this type of packaging.
- Upon bringing bird food home place it in the freezer for 3-4 days. The temperature will kill any eggs and larvae present in the food.
- If you see the tell-tale webbing in your parrot's food, throw it out
- Destroy cocoons and larvae that may be found in the cracks between shelves, moldings, and doorframes, on ceilings of cupboards, or where room walls and ceiling meet.
- Some herbs such as basil have been reported to repel seed moths. Place some basil leaves in your bird food storage container.
- Diatomaceous earth (use food grade only) will kill newly hatched larvae when mixed in your bird seed. Diatomaceous Earth is a fossilized deposit of microscopic shells created by one-celled plants called Diatoms. These plants inhabit all the waters of the earth, and serve as the basic food for aquatic life, just as grass is the basic food for land animals.
- Use a bird safe insecticide such as Camicide to kill adult moths. Camicide contains pyrethrins which are produced by certain species of the chrysanthemum plant and are known to be one of the safest ways to get rid of insects in your bird room. (Note: never spray Camicide directly on your parrot's food and remove your birds from any room while spraying aerosols of any type).
- Pheromone based Flour Moth Traps work without the need for insecticides. Pheromones lure the male moths into the trap where they become stuck and die. This reduces the breeding population of moths.
- Category: Hygiene
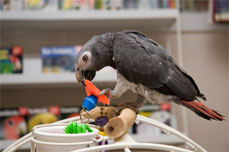 Birds often have "accidents" on their toys and perches as well as intentionally goop them up with regurgitated food. Toys and other cage accessories that have been pooped on can harbor dangerous bacteria and pose a risk of infection to your bird. In our article Maintaining a Clean Environment we laid out a recommended routine as well as some helpful hints for cleaning your bird's cage. It is also important to incorporate the inspection and cleaning of toys and perches into your weekly environmental plan.
The nature of the materials used in a particular toy or perch dictates the appropriate cleaning procedure to follow:
Plastic or Acrylic
- If they won't melt, plastic and acrylic toys can best be disinfected by washing them in the dishwasher.
Wood
- If you need to clean wood toys, don't soak them. It is best to scrape off any fecal matter and then wipe them with a damp cloth or sand the soiled area until clean. If your bird loves to dunk his toys beware that moisture can promote bacterial growth and the toys should either be discarded or thoroughly cleaned and dried in a low temperature oven (250°) before returning them to your bird.
Cloth, Leather or Rope
- Again, don't soak these materials for extended periods. You can clean them by brushing or scraping off any solid waste material and then hand washing them with soap and water followed by a thorough rinse. These items should be dried thoroughly before returning them to your bird's cage.
Cement
- Cement perches have lots of nooks and crannies where bacteria can hide. They should be soaked in a dilute bleach solution (1/2 cup bleach to 1 gallon of water) and scrubbed weekly.
When using a cleaner or disinfectant be sure to remove all chunky organic material (food, poop) prior to cleaning so that the disinfectant can operate effectively. Remember to always use bird-safe cleaning products and to remove your bird from any room where you are using cleaners.
Write comment (0 Comments)- Category: Hygiene
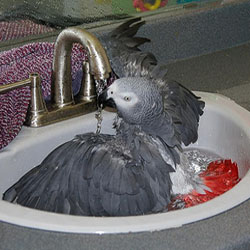 If you have a bird you will have feather dust in every nook and cranny of your home. It takes vigilance to keep up with it.
So what is it and where does it come from.....
When a feather develops you will notice a distinct sharp protrusion from the skin. As it grows, the feather will take on the appearance of a quill complete with a blood vein surrounded by a protective keratin sheath. This protective sheath will dry up and fall off once the feather has fully matured. The breaking up of the keratin sheath is the cause of feather dust.
When birds preen they are meticulously rearranging and reordering their feathers. They are also breaking open the sheaths on new feathers. These actions are usually followed by a fluffing and shaking action whereby they send this very fine dust floating throughout your house. Aaaachoooo!
To make matters worse, some bird species, most notably Cockatoos, Cockatiels and African Greys, also have additional feathers that shed a very fine powder of keratin which acts to waterproof their feathers when the bird preens. Birds with these extra feathers are called “Powder Down Birds.” Powder down can be a hazard to one's health if you or a family member has allergies, asthma, or respiratory problems. Your other birds can also develop respiratory problems if you have a powder down bird.
There are some steps you can take to help minimize the occurrence and impact of feather dust on your home and health:
- Give your bird regular baths to help rinse the dust directly off of them.
- Wipe down the surface of your bird's cage with a damp cloth daily.
- Change cage bottom daily.
- Lightly mist the cage bottom liner before disturbing it to decrease the amount of dust you stir up when you remove it.
- Vacuum or damp mop around the cage immediately after changing the cage bottom
- Invest in an air purification system for your bird room.
- Use a vacuum with a HEPA or water filter system to trap fine dust particles.
- Replace furnace and air conditioning filters at least monthly.
- Use commercial bird grooming sprays.
- Written by: Deb White
- Category: Hygiene
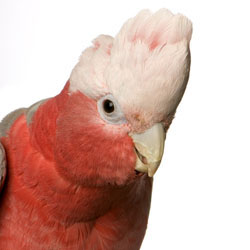 The use of disinfectants can assist in protecting our birds from bacterial, viral and parasitic diseases. These diseases can easily be spread between birds via dirty dishes, contaminated water supplies, used toys or cages, or contact with hands and clothing.
Without following established disinfection routines your bird can be exposed to a variety of disease causing and life threatening organisms. Whenever you bring home a new bird not only should they be quarantined but you should also disinfect all supplies that they came home with. Extra special care should be taken open returning home from bird shows where you can easily pick up disease causing agents and bring them home on your hands, clothes or shoes.
First of all, it must be clarified that cleaning and disinfecting are two completely different processes. Cleaning removes dirt and most germs. However, after cleaning, even though things might "look" clean, germs are still lurking around. Disinfection is the process of killing germs.
Disinfectants are chemical agents that are registered with the EPA and most disinfectants are not safe for birds. Careful choice of a disinfecting agent is an absolute must.
Pet Focus is thr only disinfectact brand that has been specially formulated for avian use and it is EPA certified effective against more than 50 pathogens including those responsible for Exotic Newcastle's Disease, Psittacosis, Avian influenza, Avian Polyoma, Klebsiella, E. Coli, Pseudomonas and more.
Bleach (Sodium Hypochlorite) is an effective disinfectant, but it also gives off chlorine gas which is a respiratory irritant. Bleach should only be used when your birds are removed to a separate room in the house. They should not be returned to their cage until it has dried completely and the room has been well ventilated.
Grapefruit Seed Extract (GSE) is a non-toxic, natural cleaner and anti-bacterial agent that can be safely used on food prep surfaces and cages. GSE can be purchased at your local health food store or over the internet and it is known to be effective against strep, staph, Chlamydia, salmonella, E. Coli, influenza, parasites, fungi and several viruses.
Always read the labels and follow the instructions when using a disinfectant.
Write comment (0 Comments)- Category: Hygiene
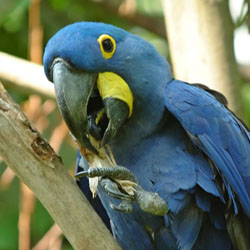 Grooming Your Bird's Nails
It is easy to know when your parrot’s nails need attention. The first sign we often recognize is usually the presence of scratches and punctures on your own hand or shoulder (ouch!) or we might observe our bird nibbling on his nails. Another way to periodically check is to simply place your parrot companion on a flat surface. If a nail is so long that it lifts the ball at the end of the toe off the surface then your bird is in need of a manicure. Overgrown nails can prevent proper toe alignment and, in turn, make it difficult to grip food and perches properly. In extreme cases, seriously overgrown nails can cause lameness.
There are many handy grooming tools to assist you in maintaining trimmed nails for your parrot companion. Some people prefer to use nail clippers and others prefer to use dremmel or cautery tools. Dremmel tools grind the nail down using an abrasive wheel. Cautery products separate the nail by burning through it. The benefit of using either a dremmel or cautery tool is that if you trim the nail too short and nick the vein, the friction of the dremmel and the heat of the cautery tool will cauterize the vein and stop the bleeding. Another benefit of using a dremmel is that it often leaves a smooth rounded nail surface instead of a rough edge.
No matter what tool you decide to use, be sure to know what you are doing before you start. Always seek professional veterinary help, if you do not feel comfortable in manicuring your parrot companion yourself. At a minimum, it is highly recommended that you get a lesson in nail grooming from your avian vet so you know the proper techniques for restraining your bird, how to use the tools and how short and at what angle to cut your bird's nails.
If you decide to proceed with grooming be sure to:
- Be prepared. Assemble all the supplies you will need including the appropriate tools, towel, and first aid kit containing a clotting agent.
- Have a friend on hand to gently restrain your bird while you handle the trimming.
- Be aware that there is a blood vein inside each nail. Carefully examine the nail for veins which are easy to spot in birds with light colored nails and nearly impossible to spot in birds with dark nails.
- If you can't spot the vein, remove the sharp tips only. It's better to remove a little bit at a time rather than too much.
- Cutting too short can be painful to a bird and will increase the risk of bleeding.
- If bleeding occurs apply a clotting agent to the nail with pressure until the bleeding ceases.
- Be careful not to twist your parrots feet and legs as this may cause injury.
- Check your bird's nails after a few minutes to make sure bleeding doesn't occur or reoccur.
Clipping your parrot companion’s nails may leave irregular edges that you might want to buff out.
Write comment (0 Comments)- Category: Hygiene
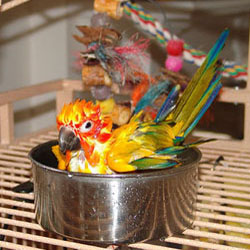
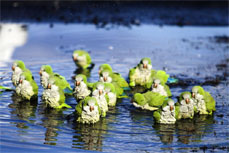 In the wild, all birds bathe regularly to ensure their feathers are maintained in tip-top flight condition. Bathing stimulates preening which removes dirt, dander and unwanted visitors from feathers. Parrots have been observed getting their baths during rainstorms, splashing in puddles or streams, rubbing against leaves that condense moisture in the high humidity tropical environment and by taking dust baths when water is not plentiful.
Each individual parrot has its own preference when it comes to bathing. Figuring out just what that preference is can sometimes be a challenge but don't give up by thinking "my bird hates baths". Providing your bird with daily bathing opportunities is another essential ingredient in keeping your bird healthy and beautiful. Besides the obvious benefit bathing has on feather condition it also helps to keep dander levels down and it is good for your bird's skin and respiratory health as the moisture and humidity helps to maintain sinus and nasal passage health.
Here are some ways that your bird might like to bathe:
- Wading: Many birds are pool bathers and love to splash around in shallow water. Try a birdbath, bowl or pan of water no higher than your bird’s legs, placed at the bottom of its cage. Some bird's even love to bathe in a sink with the water running gently.
- Misting: Most birds prefer a gentle falling mist like spray. Point the mister in a fashion that allows the water to fall down gently like rain. Be careful not to spray directly into the face as this is uncomfortable and may frighten your bird.
- Showering: Many birds like the sound of running water and the larger drops of a shower. Shower perches are available that provide non-slip surfaces for your bird to grip. A few hints about showering:
- Try showering with your bird and have a fun time together "singing in the rain."
- Place the perch off to the side not directly under the spray.
- Allow your parrot time to adapt to the shower on its perch while it observes you shower.
- Gradually introduce your parrot companion to the water.
- Rolling in Leaves: For small birds, try placing wet lettuce leaves or large leafy green vegetables at the bottom of their cage. Many small birds love to roll in the leaves and get some good nutrition at the same time.
A few other tips related to bathing:
- Bathe daily if possible or at least a minimum of three times per week. Bathing promotes healthy skin and feathers.
- Bathe more frequently in dryer months to maintain a healthy respiratory system. Our winter heating systems result in very low indoor humidity levels which are unhealthy for our birds.
- Bathe your parrot companion during the warmest part of the day so the bird will dry before the temperature falls.
- Always use luke warm to slightly cool water to avoid burns or shocking your bird's system.
- Never drench your bird’s feathers because they can lose precious body heat.
- Make a game of bathing time. If you are enjoying yourself, your bird will likely enjoy himself. In our house we always sing the made up song "It's Birdie Bathy Time" (sung to the old time favorite Ta-ra-ra Boom-de-ay) inserting each bird's name as we move from cage to cage with the mister. Everyone including mom ends up dancing and having a good time.
- Many birds are instinctually stimulated into bathing activity by the sound of a vacuum running. Perhaps the sound is reminiscent of a rainstorm in the tropics?
- If you have an outdoor aviary, an outdoor misting system is a great alternative on a warm sunny day.
- If your bird really gets soiled or greasy you may want to use a bird safe shampoo to help restore your bird's feathers. Consult with your avian vet on the best way to proceed depending on the contaminant and always read the product label and follow the instructions provided.
- Avoid human bathing and shampooing products as they can strip the special preening oils your bird possesses.
- Some birds love getting a blow dry after taking a bath but it's not necessary or even recommended. Make sure that the temperature setting on the hair dryer isn't too high.
- If using a birdbath, pan or bowl of water in your bird's cage, remove it when the bathing is complete and replace any wet cage bedding below to prevent mold growth.
- Written by: Deb White
- Category: Hygiene
 We all have preferences as to what household cleansers we use, what we use them for and how often we use them. Window cleaners, oven cleaners, furniture polish, drain cleaners, spot removers… the list goes on and on. The problem is that many of these “off the shelf” cleaning products contain caustic chemicals and fumes that can be harmful and potentially deadly to your bird (and your family too!)
Just because cleaners are sold in the grocery store doesn’t mean they are safe. The components in many household cleaners are actually classified as hazardous waste. Over 100 chemicals commonly found in our homes have been linked to a wide range of medical issues such as allergies, asthma, headaches, chronic fatigue, nervous disorders and depression. Recent research found that the use of spray household cleaners could increase the risk of developing asthma by nearly 50 percent in humans. Just imagine the impact on our avian companions who have the most efficient respiratory systems in all of the animal kingdom. The result is that our birds are much more susceptible to airborne toxins.
Don’t worry, I’m not going to scare you with horror stories about what could happen to your bird. There are many stories on the internet of birds who have died or have become ill as the result of exposure to the chemicals and fumes from carpet, furniture, bathroom, glass and oven cleaners. Several products have been linked to bird deaths (Carpet Fresh, Fabreze, Scotchguard, Arm & Hammer Pet Fresh just to name a few). Instead, I want to share some safer cleansers alternatives that you can make in your own kitchen with everyday, inexpensive ingredients that can replace many of the store bought cleansers that we have all become too accustomed to using. These homemade cleansers are not just bird friendly, they are also environmentally and kid friendly too AND they are less expensive than store bought cleansers. Talk about a win-win situation!
I hope you’ll find this information helpful and useful to use in your own home and that you’ll share it with everyone you know, even if they don’t have birds!
Here are the most commonly used household cleansers that you can make right in your own kitchen and with products you probably already have on hand:
All Purpose Spray Cleaner
A combination of baking soda and water (when in doubt you can’t go wrong with this combo) is great for cleaning counter tops, floors and sinks. When you’re done cleaning, you can even pour the rest down your kitchen sink or garbage disposal to eliminate sink odors.
- ¼ cup baking soda
- 1 quart of water
Mix in a bucket or pour into a spray bottle.
Bathroom Cleaners
Forget Tilex or Mr. Clean, a borax mixture is a great safe alternative for cleaning bathrooms. Combine the following:
- 3-4 cups of hot water
- 2 tsp. Borax
- 4 Tbs. distilled white vinegar
- ¼ tsp. liquid soap
Mix well and pour in a spray bottle.
For tougher cleaning jobs, baking soda also makes a great soft scrub cleanser. Just add several drops of plain liquid soap to baking soda and mix thoroughly to create the paste that you can safely use to scrub your tub, tile and sink.
If mildew is a problem, straight vinegar reportedly kills 82% of molds. Spray the moldy area and let it sit. The smell of vinegar typically dissipates in a few hours but it can be an irritant. Be sure to close your bathroom door and leave the fan on to help remove the fumes.
Safety note: Never combine vinegar with household bleach. The fumes given off (chlorine gas) are toxic!
Drain Cleaners
For clogged or slow draining sinks and tubs:
- ½ cup baking soda
- ½ cup distilled white vinegar
- ½ cup table salt
Pour the mixture into the drain and let it stand for 15-20 minutes. Flush with BOILING water. Repeat as necessary to remove the clog.
Glass, Window & Mirror Cleaners
Toss out the Windex, here are two options for an all purpose glass cleaner.
Option 1
- 1 cup distilled white vinegar
- 1 gallon water
Put in a spray bottle
Option 2
- ½ tsp liquid soap
- 3 Tbs. distilled white vinegar
- 2 cups of water
Mix together and put in a spray bottle. Shake gently before each use.
Note: Option 2 is my favorite because it has the liquid soap in it and it cleans residue and greasy build up really well.
Oven Cleaner
- Baking soda
- Water
Cover the bottom of your oven generously with water, then cover the oven bottom with enough baking soda that it is white. Spray more water over the baking soda. Let the treatment sit overnight to loosen the grease. In the morning, remove the excess baking soda and grease with a hot wet cloth and wipe down the inside of the oven with a wet and soapy sponge until all the greasy residue is gone.
Furniture Polish
- 1/2 cup distilled white vinegar or fresh lemon juice
- 1 tsp olive oil
Mix the ingredients in a glass jar. Apply sparingly with a clean soft cloth and buff to a shine. Cover the glass jar and store for future use.
Carpet Cleaners
For odor removal: sprinkle the affected area with baking soda, let stand for 15 minutes and vacuum thoroughly.
For stains: If you need to “shampoo” your carpet there are plant based cleaners you can buy (citrus based cleaners work best) or you can do it yourself by mixing grapefruit seed oil and water in your own shampooer using 12 drops of GSE per gallon of water.
Vinyl Floor Cleaners
For vinyl floors use a damp mop with the following mixture:
- ½ cup distilled white vinegar
- 1 gallon warm water
Disinfectants
Grapefruit Seed Extract is a natural disinfectant. Mix 20 drops of grapefruit seed extract into 2 quarts of water and pour it into a spray bottle to use on all surfaces you’d like to disinfect.
Write comment (0 Comments)